ChasteBase
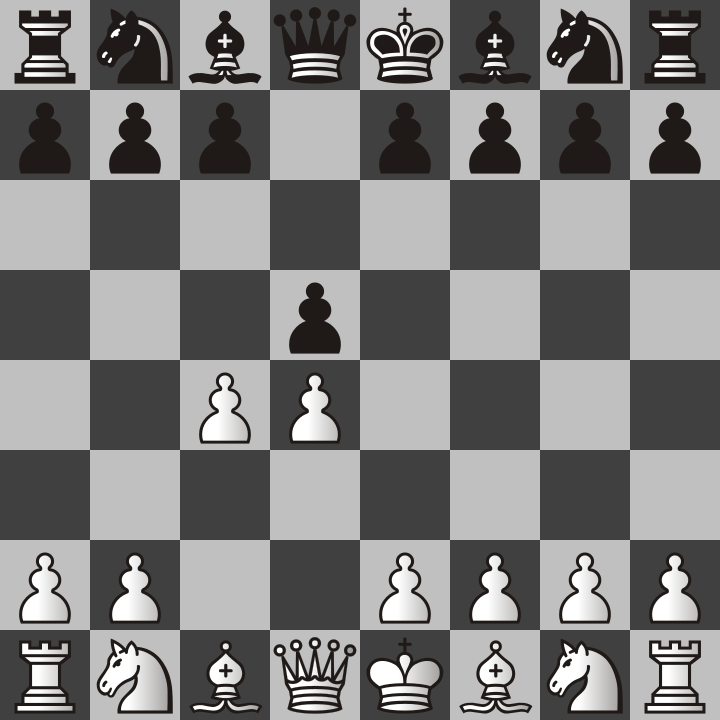
1. d4 d5 2. c4
This position is called the Queen’s Gambit. This opening is my favorite because it is a trap designed to fool the opponent into taking a pawn and then gain a huge advantage. Smart players will know to avoid taking the pawn on c4. However, I have written extensive information on what to do if they do accept the gambit. The following portion is taken from a book I will eventually write about the Queen’s Gambit opening. I don’t expect it to be done anytime soon so please enjoy my notes below!
In this position, black’s pawn can capture the white pawn and yet it doesn’t appear that white can capture it back, at least not yet. If it does take the pawn, this is known as accepting the gambit. New players will more likely than not take this pawn if they don’t see the trap.


You see, the idea was to distract the pawn and move it away from the center so that white’s king pawn could move two squares forward. Also notice that the white bishop on f1 could also capture the black pawn on c4 next turn, but not so fast, first, black has to choose their next move. The only problem is that there really is no good way for black to stop white from taking their pawn with the bishop. If they try to protect it with another pawn, things can turn out badly. Sooner or later white will capture back the c4 pawn with the bishop and if black tries to stop it, they will only lose more pieces.
My best advice is that if you accept the Queen’s Gambit, also accept that you will lose this pawn and don’t try to defend it by moving the b7 pawn to b5. This has never worked out well for my opponents.
All white has to do is move a pawn to a4 to attack the b5 pawn. The goal is to remove it from defending the c4 black pawn. White’s bishop wants to go there to attack the f7 square.
If you are black, do not let the sequence of the following images happen to you!


I also want you to notice that the previous sequence of moves would still be just as bad if white had decided to move their king’s pawn only one space to e3. There are valid reasons they might do so to add extra protection to the d4 pawn. The d4 pawn is only protected by the queen right now so beware of this in all your games.
In the Queen’s Gambit Accepted, I prefer to move the king’s pawn to e3 because of a really awesome trap that has caused me to win a lot of games. Black’s most common way of protecting the c4 pawn is with pawn to b5. This never works well for black. And in this case, there is a 100% chance of black either losing a rook or a knight.
Let me show you what happens in if white moves pawn to e3 instead of e4 after black defends the c4 pawn with b5.


If you are the black player, I would recommend against accepting the Queen’s Gambit entirely. It leads to many traps by white. If you do accept it, you will lose your pawn anyway. Don’t waste time with that and instead move out other pawns depending on what pieces you plan to move.